Welcome to Excel Course Lesson 1. In this lesson, you will learn how to launch Excel, all the components of the Excel spreadsheet, and how to save an Excel document.
How to launch Excel
The components of the Excel spreadsheet
How to save an Excel document
How to get Microsoft Excel
Disclaimer: I am not responsible for any damage that may occur.
Launch Microsoft Excel
To launch Microsoft Excel, follow these steps based on the operating system you are using:
(Make sure that Microsoft Excel is installed on your computer before following these steps. If you haven’t installed it, you will need to do so before being able to use it.)
On Windows:
- Start Menu:
- Click on the “Start” button in the lower-left corner of your screen.
- Type “Excel” in the search bar.
- Click on the Microsoft Excel icon when you find it.
- Taskbar:
- If Excel is pinned to the taskbar, you can launch it by simply clicking on its icon.
- File Explorer:
- Navigate to the directory where Microsoft Excel is installed (usually in the “Program Files” folder).
- Look for the Excel application (it might be named “excel.exe”) and double-click on it.
On macOS:
- Dock:
- If Excel is pinned in the dock, you can launch it by clicking on its icon.
- Finder:
- Open Finder.
- Go to the Microsoft Excel application (usually in the “Applications” folder).
- Double-click on the Excel icon.
- Spotlight:
- Use Spotlight by pressing
Cmd + Spaceand type “Excel.” - Select Microsoft Excel from the search results.
- Use Spotlight by pressing
On Linux:
- Application Menu:
- Use the application menu of your desktop environment (e.g., GNOME, KDE) to find and launch Microsoft Excel if you have it installed.
- Terminal:
- Open a terminal.
- Type the appropriate command to launch Excel. The exact command may depend on the Linux distribution you are using.
The components of the Excel spreadsheet
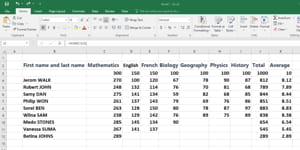
An Excel spreadsheet consists of several components that allow users to organize, analyze, and manipulate data. Here are the main components of an Excel spreadsheet:
- Workbook:
- An Excel file is called a “workbook.” It can contain one or more worksheets.
- Users can have multiple workbooks open at the same time.
- Worksheet:
- A worksheet is a grid of cells organized in rows and columns.
- Each worksheet is identified by a tab at the bottom of the Excel window.
- By default, a new workbook opens with three worksheets (Sheet1, Sheet2, Sheet3).
- Cell:
- A cell is the intersection of a row and a column on a worksheet.
- Each cell is identified by a unique address, such as A1 (column A, row 1).
- Cells can contain data, formulas, or functions.
- Column:
- Columns are vertical sections identified by letters (A, B, C, …).
- Excel has 16,384 columns (from column A to column XFD in Excel 2007 and later versions).
- Row:
- Rows are horizontal sections identified by numbers (1, 2, 3, …).
- Excel has 1,048,576 rows.
- Cell Content:
- The content of a cell can be text, numbers, dates, formulas, or a combination of these.
- Users can enter and format data in cells based on their requirements.
- Formula Bar:
- The formula bar displays the contents of the active cell.
- It is also used to enter or edit data, formulas, or functions.
- Ribbon:
- The ribbon is the toolbar at the top of the Excel window that contains tabs, each with related commands and functions.
- It provides access to various tools and features for formatting, data analysis, and more.
- Menu Bar:
- The menu bar contains dropdown menus that offer additional options for working with Excel.
- Name Box:
- The name box displays the address or name of the active cell.
- Status Bar:
- The status bar, usually at the bottom of the Excel window, provides information about the current status of the spreadsheet and may offer quick access to certain settings.
- Headers:
- The row and column headers (labeled with numbers and letters) help identify the location of cells in the spreadsheet.
Understanding these components is essential for efficiently working with Excel and performing various tasks, such as data entry, calculations, and data analysis.
How to save an Excel document
After opening MS Excel to create a document, you can save it even before entering the first character. As you work, you can continue to update it. Save the document using the “Save As” or “Save” command. Here’s how:
- Click on the “File” menu in the upper-left corner.
- Choose “Save As”:
Select “Save As” from the menu. This will open the Save As dialog box. - Choose Location:
Navigate to the folder or location where you want to save the file. - Enter File Name:
Enter a name for your file in the “File Name” field. - Select File Type:
Choose the file type or format you want to save the Excel file as (e.g., Excel Workbook (.xlsx)). - Click “Save”:
-
Click the “Save” button (that is in top left) to save the file.
-
Use the keyboard shortcut:
Windows: Ctrl + S.
Mac: Cmd + S.Save Subsequent Changes:
After you have saved the file for the first time, you can simply use the two last options.
Remember to save your work regularly to avoid losing data in case of unexpected events like a power outage or program crash.
Download and install Microsoft Office Excel
Download and Install Microsoft Office 2013:
Visit the Microsoft Download Center:
Go to the Microsoft Download Center .
Search for Office 2013:
Use the search bar to find “Microsoft Office 2013.”
Select the Appropriate Version:
Choose the version of Microsoft Office 2013 that corresponds to your product key (e.g., Office Home and Student 2013, Office Home and Business 2013).
Click Download:
Once you’ve selected the appropriate version, click on the “Download” button.
Enter Your Product Key:
During the installation process, you may be prompted to enter your product key. Make sure to have it handy.
Download the Installer:
The website will provide you with an installer file. Download the file to your computer.
Run the Installer:
Locate the downloaded file and run the installer.
Follow Installation Instructions:
Follow the on-screen instructions to install Microsoft Office 2013 on your computer.
Activate Office:
After installation, you’ll need to activate Office using the product key you entered during the installation process.
Complete the Setup:
Once activated, complete any additional setup steps, if required.
Note:
- Ensure that your computer meets the system requirements for Microsoft Office 2013.
- Keep your product key in a safe place, as you may need it for future installations or activations.


