Filmora is a popular video editing software developed by Wondershare. It offers a user-friendly interface and a wide range of features that make it accessible to both beginners and professionals.
In this guide, I will provide you with detailed instructions on how to download, install, and use Filmora, as well as the system requirements for running the software.
Disclaimer: I am not responsible for any damage that may occur.
System Requirements
To run Filmora smoothly on your computer, ensure that your system meets the following minimum requirements:
For Windows
Operating System: Windows 7 or later (64-bit).
Processor: Intel i3 or higher multicore processor (AMD equivalent).
RAM: 4GB or more.
Graphics Card: Intel HD Graphics 5000 or later; NVIDIA GeForce GTX 700 or later; AMD Radeon R5 or later.
Disk Space: At least 10GB of free space for installation.
Internet: Required for software activation and online resources.
For macOS
Operating System: macOS X 10.11 or later.
Processor: Intel i5 or higher multicore processor.
RAM: 8GB or more.
Graphics Card: Intel HD Graphics 5000 or later; NVIDIA GeForce GTX 700 or later; AMD Radeon R5 or later.
Disk Space: At least 10GB of free space for installation.
Internet: Required for software activation and online resources.
Please note that these are the minimum requirements, and for optimal performance, it is recommended to have a more powerful system with higher specifications.
Downloading Filmora
To download Filmora, follow these steps:
Open your preferred web browser and go to the official Filmora website. You can find it by searching for “Filmora” in a search engine.
Once on the Filmora website, navigate to the “Products” or “Download” section.
Look for the version of Filmora that suits your operating system (Windows or macOS) and click on the “Download” button.
Your browser will start downloading the Filmora installation file. The file size can vary depending on the version, so it may take some time to complete.
Installing Filmora
After downloading the installation file, you can proceed with the installation process.
For Windows:
Locate the downloaded installation file (usually in the “Downloads” folder) and double-click on it to start the installation.
If prompted, choose your preferred language for the installation process and click"OK."
The Filmora installation wizard will open. Click on the “Install” button to begin the installation.
Review the license agreement, select the checkbox to agree to the terms, and click"Next."
Choose the destination folder where you want to install Filmora or leave the default location as it is. Then, click “Next.”
Select the components you want to install. By default, all components are selected. Click"Next" to continue.
Choose whether you want to create a desktop shortcut for Filmora and click “Next.”
Review the installation settings and click “Install” to start the installation process.
Wait for the installation to complete. It may take a few minutes depending on your system’s speed.
Once the installation is finished, click “Finish” to exit the installation wizard.
For macOS:
Locate the downloaded DMG file (usually in the “Downloads” folder) and double-click on it to mount the disk image.
In the mounted disk image, double-click on the Filmora installer package (ends with .pkg) to start the installation.
The macOS installer will open. Follow the on-screen instructions to proceed with the installation.
Review the license agreement, click “Continue,” and then click “Agree"to accept the terms.
Choose the destination where you want to install Filmora or leave the default location as it is. Then, click “Continue.”
Select the components you want to install. By default, all components are selected. Click “Continue” to proceed.
Review the installation settings and click “Install” to start the installation process.
Enter your administrator password when prompted and click “Install Software” to proceed.
Wait for the installation to complete. It may take a few minutes depending on your system’s speed.
Once the installation is finished, click “Close” to exit the installer.
Using Filmora
Now that you have Filmora installed, you can start using the software to edit your videos. Follow these steps to get started:
Launch Filmora by double-clicking on the desktop shortcut or searching for it in your applications folder.
When Filmora opens, you will be greeted with a welcome screen. You can choose to create a new project, open an existing project, or access recent projects.
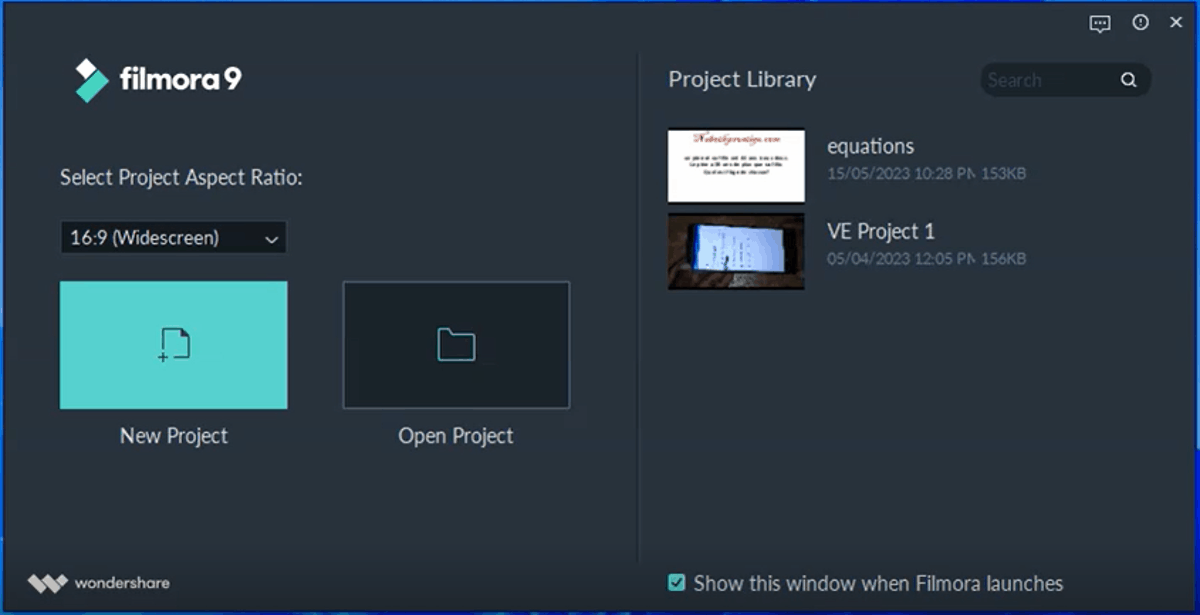
If you’re creating a new project, click on the"New Project” button. Give your project a name and choose the aspect ratio for your video (e.g., 16:9 for widescreen or 9:16 for vertical videos).Click “Create” to proceed.
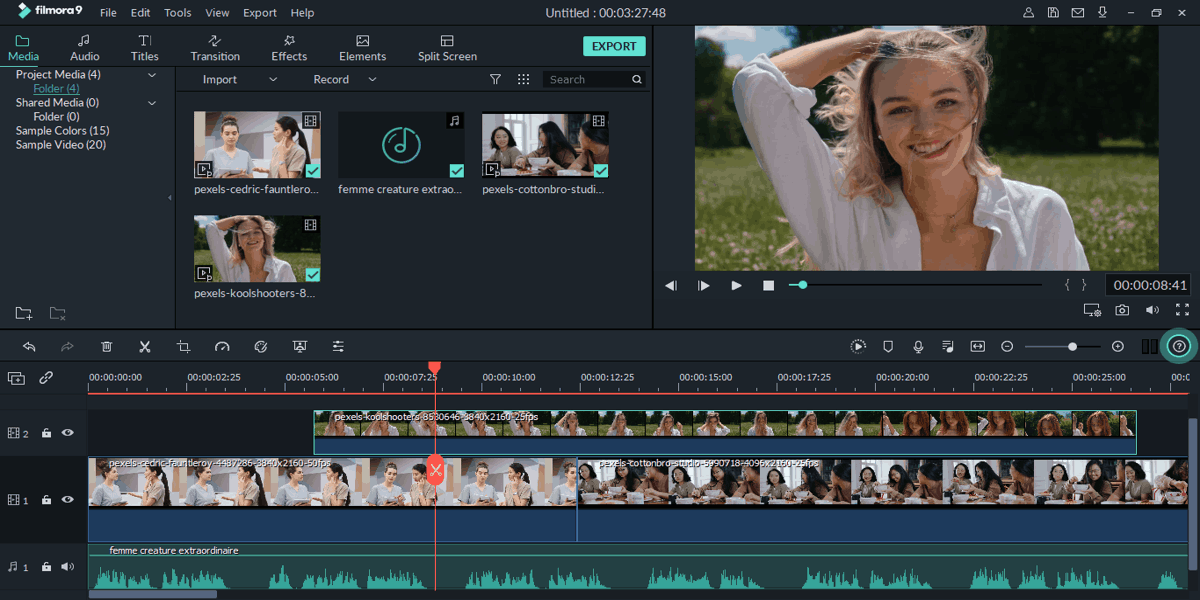
Once in the main editing interface, you’ll see the timeline at the bottom, where you can drag and drop your media files (videoclips, images, and audio) for editing.
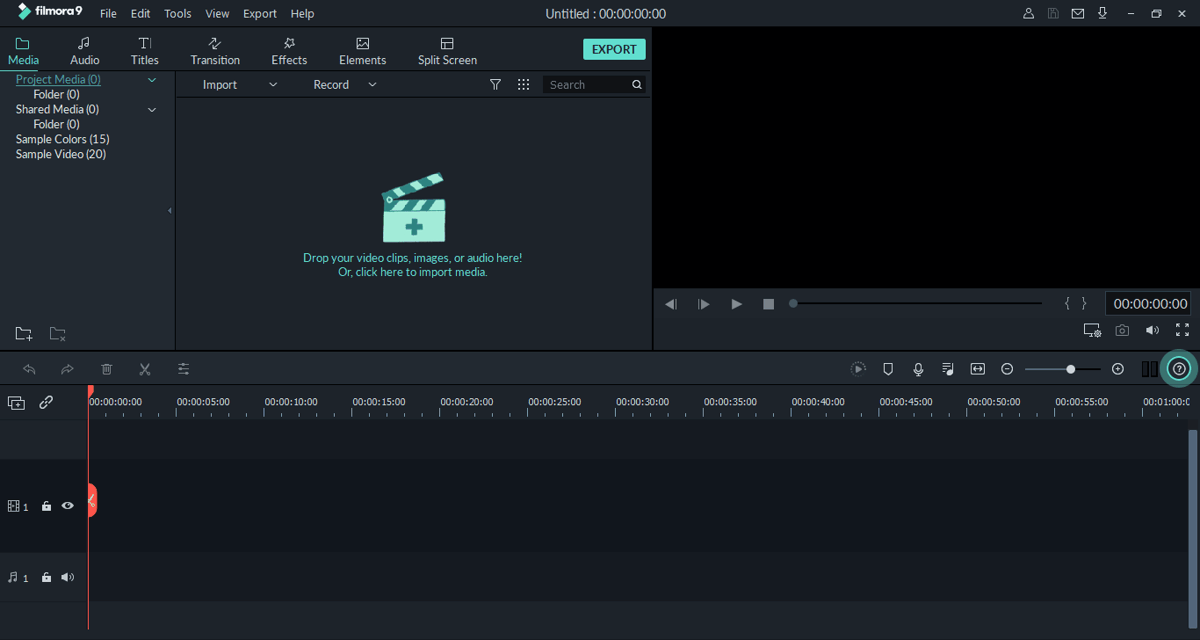
To import media files, click on the “Import"button located on the top left corner of the interface. Browse and select the files you want to import, and click “Open” to add them to your project.
Once your media files are added to the timeline, you can start editing them. Filmora provides various editing tools and features such as trimming, splitting, cropping, adding transitions, applying effects,and more.
To apply an effect or edit a clip, select the clip onthe timeline and click on the corresponding tool or effect in the toolbar orthe effects panel. Adjust the settings to your preference.
You can add text to your videos by clicking on the “Titles” tab in the toolbar and selecting a title template. Customize the text, font, color, and position as needed.
Filmora also offers a library of pre-built transitions, filters, and overlays. You can access these by clicking on the respective tabs in the toolbar and dragging them onto the timeline.
Once you have finished editing your video, you can preview it by clicking on the “Play” button in the preview window. If you’re satisfied with the result, you can export the video by clicking on the"Export” button. Choose the desired output format, resolution, and quality settings, and click “Export” to save the video to your computer.
Filmora is a versatile video editing software that offers a range of features and tools to create professional-looking videos. With the information provided in this guide, you should be able to download,install, and use Filmora successfully.
Remember to check the official Filmora website for any updates or additional resources that can enhance your video editing experience.
Share on: