Windows 11 is the latest operating system developed by Microsoft, succeeding Windows 10. It was officially announced on June 24, 2021, and became generally available on October 5, 2021. Windows 11 introduces several new features and improvements over its predecessor, including a redesigned Start menu, a centered taskbar, improved virtual desktops, and enhanced gaming capabilities.
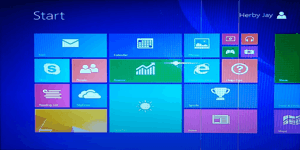
Windows 10 is a widely used operating system developed by Microsoft. It was released on July 29, 2015, and has since become the standard operating system for many PCs, laptops, and tablets. Windows 10 was designed to address the shortcomings of its predecessor, Windows 8, and to provide a more user-friendly experience for both desktop and touch-based devices.
Windows 11 and Windows are the most popular and widely used versions nowadays, so it’s likely that your computer is using one of them or you may need one. If you already have the preferred version, I will learn how to reinstall it if necessary. And if you don’t have it yet, I will learn how to install it on your computer, all without losing your data.
In this tutorial, I will teach you How to upgrade to Windows 11 or Windows 10 and how you can reinstall any version of Windows without losing your data.
I am not responsible any damage that may occur.
Upgrade to Windows 11 by updating
Windows Update:
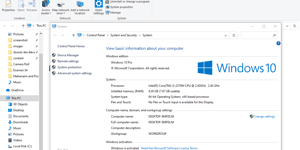
Make sure your Windows 10 is up to date. Go to Settings > Update & Security > Windows Update, and click on “Check for updates.” Install any pending updates.
Once your system is up to date, Microsoft will notify you through Windows Update if your device is eligible for the Windows 11 upgrade. You should see an option to upgrade to Windows 11.
Click on the available update for Windows 11 and follow the on-screen instructions to initiate the download and installation process. This process may take some time, and your computer will likely restart several times.
Follow On-Screen Instructions: During the upgrade process, you may need to make decisions such as accepting the license terms and customizing settings. Make sure to read and understand these options before proceeding.
Completion and Post-Upgrade Setup: Once the installation is complete, Windows 11 will boot up. Follow the on-screen setup prompts to configure your preferences and settings.
Installation of Windows 11
- Insert the Bootable USB Drive or the DVD of Windows into the computer.
- Restart the computer.
- Press F12 to choose to boot the computer from USB or DVD.
- Use the arrows on the keyboard to select the USB or DVD and press enter and follow the instructions to continue till you see “Custom (advanced)”, Click it. Now you can modify everything. You can choose to keep all files or delete them, and whether to partition your hard drive or not.
If you wanna delete all your data click the storage (HDD or SDD) click Drive options (advanced), click format, and click next.
You can separate your Hard Disk or not; in the Drive options (advanced), click separate and choose the capacity of each part of the storage.
(N.B If you separate your HDD, all your data will lose too)
If you wanna keep all your data click the storage and just click next.
Click ok (to have a folder Windows old.)
Wait for the installation of Windows.
Where are your data after installation?
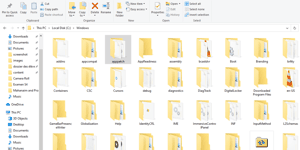
When you install a new version of Windows without deleting the previous version, the operating system creates a folder called “Windows.old” on your system drive (usually the C: drive). This folder contains the previous Windows installation along with all the files, settings, and programs from your previous version of Windows. The purpose of this folder is to allow you to revert to the previous Windows version if you encounter issues with the new installation or if you decide to go back to the previous version for any reason.
Here’s what happens when you install Windows without deleting the previous version:
- Windows.old Folder: After the new version of Windows is installed, the system moves all the files and settings from the previous installation into the Windows.old folder. This includes your user profiles, documents, pictures, music, videos, and program files.
- New Windows Installation: The new version of Windows is installed in the main Windows directory, and your computer boots into this new version by default.
- Recovery Option: If you encounter problems with the new installation or realize that you need some files or settings from the previous version, you can access the Windows.old folder to retrieve the data or revert to the previous Windows version.
It’s important to note that the Windows.old folder can take up a significant amount of disk space, so if you’re sure that you won’t need to revert to the previous version and you need the storage space, you can choose to delete the Windows.old folder to free up space on your hard drive.
To delete the Windows.old folder:
- Disk Cleanup Tool: You can use the Disk Cleanup tool in Windows to remove the Windows.old folder. Search for “Disk Cleanup” in the Start menu, select the drive where Windows is installed (usually C:), and then click on the “Clean up system files” button. Check the “Previous Windows installation(s)” option, click OK, and then confirm that you want to delete these files.
- Storage Settings: In Windows 10 and later versions, you can go to Settings > System > Storage. Under the “Storage sense” section, click on “Configure Storage Sense or run it now.” Here, you can enable Storage Sense and configure it to delete the previous version of Windows automatically.
Always ensure that you have backed up any important data before deleting the Windows.old folder to avoid accidental loss of files.
Share on: