![]()
Windows 10 is an operating system that was released in July 2015 and is installed on new computers and tablets. Many people enjoy using it, but sometimes they encounter difficulties, such as it not working properly or being difficult to use. If you are experiencing any issues with Windows 10, don’t worry, as I am here to help.
In this tutorial, I will guide you through every step of using Windows 10 and its new features.
Disclaimer: I am not responsible for any damage that may occur.
The importance of learning to use Windows 10
- It is currently one of the most widely used Windows operating systems, so you will likely encounter it in various settings such as work, home, and places of worship.
- Windows 10 is considered to be one of the best Windows operating systems, and many people are satisfied with using it.
- It is user-friendly and aesthetically pleasing, which makes it popular among users.
- Windows 10 is also one of the most comprehensive operating systems, and you will understand why once you start using it.
Quick links:
Introduction to using Windows 10
Preparing your desktop to work
Elements of your desktop
Remove and add Icons on your desktop
Introduction to using Windows 10
- Turning on the computer:
- If it’s a laptop, press the power button,
 which may be located on the side of the computer, next to the keyboard, or on the keyboard itself.
 - If it’s a desktop computer, connect it to a power source, turn on the monitor, and then turn on the case; each has its own power button .
- If the machine has several user accounts, select yours to continue booting, and if it requires a password, enter it to complete the process.
- If it’s a laptop, press the power button,
- You are currently in your workspace on the desktop. We’ll walk you through how to set it up whatever you’d like so that you may enjoy a productive day at work every day.
Elements of your desktop
It can have several key elements on your desktop:
-
Desktop Icons: These are shortcuts to programs, files, or folders you use frequently. They typically include icons like “This PC” (for accessing hard drives and other devices), “Settings,” and application shortcuts.
-
Taskbar: is an element of the operating system located at the bottom of the screen, it contains the Start button, icons for open applications, notification icons, pinned programs, and at the right side, the date and time, battery details, available connections, and volume control.
-
Start Menu: Accessible by clicking the Start button
 (the Windows logo) on the taskbar. It provides access to applications, settings, and recent files.
 -
Search Bar: Located next to the Start button on the taskbar, it allows you to search for files, applications, and perform web searches.
-
Notification Area: On the far right of the taskbar, it displays icons for background applications and provides notifications.
-
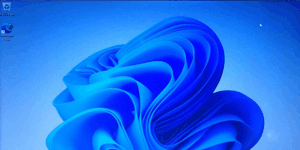
Desktop Background: The wallpaper or background image of the desktop, which can be customized with pictures or colors.
-
Recycle Bin: A special icon on the desktop where deleted files are stored before being permanently removed.
-
Widgets (if enabled): Some gadgets or widgets may be added to provide information like weather, news, etc.
-
The mouse pointer, also known as the mouse cursor, is an arrow-shaped graphic that appears on the computer screen and is used to activate or control various items. When someone moves their hand with a mouse, the mouse pointer moves in the same direction as the hand.
You can perform different actions using the mouse, such as clicking (which causes the left side of the mouse to be pressed once), double-clicking (which causes the left side to be pressed twice quickly, within one second), and right-clicking (which causes the right side to be pressed).
Preparing your Desktop for Work
To have a good workday, it’s important to have a desktop that you like and that reflects your preferences. Preparing your desktop can help you feel happier and more productive. Remove anything you don’t want to see on your desktop and add items that you need or find beautiful.
Let’s get started:
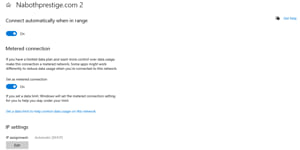
- Change desktop background
-
Right-click on the Desktop: Right-click on an empty space on your desktop.
-
Select “Personalize”: From the context menu that appears, choose the “Personalize” option.
-
Go to the “Background” tab: In the settings window that opens, you will be directed to the “Background” tab where you can change the wallpaper.
-
Choose an Image:
- To use a preset image: Click on one of the images provided in the options.
- To select an image from your computer: Click the “Browse” button to choose an image from your files.
-
Select the Image Style: You can choose how the image will be displayed (Fill, Fit, Stretch, etc.) from the dropdown menu below the image preview.
-
Apply the Changes: Once you’ve selected the image and style, the changes will be applied automatically.
You can also, go where the image is, right-click it and click set as desktop background.
-
Change the size of icons: Right-click on the desktop, move the cursor to “View,” and click on “Large icons,” “Medium icons,” or “Small icons” to choose your preferred size.
-
Auto-hide icons on your desktop: Right-click on the desktop, move the cursor to “View,” and click “Show desktop icons” to uncheck it.
-
Move icons (drag): Put your cursor on an icon, press and hold the left mouse button, and move the mouse to see the cursor move with the icon.
-
Move the taskbar: If the taskbar is not locked, you can drag it like other icons and move it to top, at left or right. If it is locked, you can right-click on it and uncheck “Lock the taskbar” to move it.
-
Rearrange icons: You can rearrange icons by dragging them to the order you want. You can also right-click the desktop, move the cursor to “Sort by,” and click on “Name,” “Size,” “Item type,” or “Date modified,” depending on your preference.
-
Adjust the brightness and color of your desktop: Right-click on the desktop, click “Display settings,” and use the horizontal bar to adjust the brightness level. You can also click on “Night light settings” below to change the color level. In the “Schedule” section, you can choose the time to activate night light, or click “Turn on now” to activate it immediately.
You can also adjust the brightness with the keyboard, Press the keys with the sun symbol; the one with the larger symbol to increase and the smaller one to decrease; the symbol may also be accompanied by an up arrow to increase and a down arrow to decrease. Sometimes, you need to press and hold “fn key” in the same time.
-
Change the size of text, applications, and other items on your desktop: Right-click on the desktop, click “Display settings,” and under “Scale and layout,” click the down arrow to change the size of text, apps, and other items. You can also change the display resolution and orientation.
Remove and Add Icons on Your Desktop
- Delete an icon: Right-click on it and click “Delete” then click “OK” or “Yes” if asked, or press “Enter” on the keyboard. Alternatively, click on it and press “Delete” on the keyboard. Or, you can just drag it to the recycle bin. When you delete an icon, the software or file that it represents is not deleted; it still exists in another place.
- Delete a file or folder: You can right-click on it and click “Delete” then click “OK” or “Yes” if asked, click on it and press “Delete” on the keyboard, or just drag it to the recycle bin. In these ways, they are not completely deleted; they are in the recycle bin. You can decide to restore them or permanently delete them before the automatic delay (which can be 30 days for a Microsoft account and 93 days for a professional and student account, unless the administrator modifies it).
- Restore or permanently delete files or folders in the recycle bin: To delete all items in the recycle bin, just right-click on it and click “Empty Recycle Bin”. However, if you want to delete some and restore others, you have to open the recycle bin to choose what you want to delete or keep. Double-click it or right-click it and click “Open”, then click on the files and click one of these options: “Restore” to restore the file, “Cut” to move the file to another place, or “Delete” to delete it permanently.
- Add an icon or file to your desktop: To add a file to your computer desktop, go to the folder where it is and copy or cut the file, go to your desktop, and paste it. To copy a file: right-click on it and click “Copy”, or click on it and press and hold “Ctrl” then press “C”; go to the desktop, right-click, and click “Paste” or press and hold “Ctrl” then press “V”. Ctrl+C = Copy; Ctrl+V = Paste; Ctrl+X = Cut. To add an icon to your computer desktop, right-click on it and move the cursor to “Send to”, then click “Desktop (create shortcut)”.
Now, you already know many things, before other things, you have to know how to turn the computer off. To Turn the computer off, click the start button![]() (in the corner bottom left), click power
(in the corner bottom left), click power![]() then click shut down.
then click shut down.
When you click the power button in Windows 10, you generally have three options: Sleep, Shut Down, and Restart. You can click what you want to do.
Go to the next lesson: Windows 10 course lesson 2
Share on: